If you’re making gluten-free casseroles and other gluten-free dishes, you’ve probably run up against this problem before: casseroles often call for cream soups like cream of mushroom soup or cream of chicken soup. And this is a problem because? Many cream soups have ingredients like wheat, or that ubiquitous and vaguely named “modified food starch.”
This is my own recipe for gluten-free cream of mushroom soup. It’s a lightly spiced soup, because I want to keep it generic enough to use in different sorts of recipes, like a tuna casserole or a swedish-meatball-style goulash. So think of this as a base that you can use for other recipes.
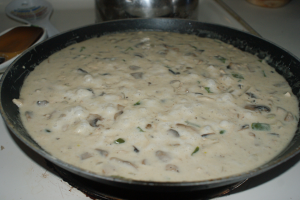
Your cream of mushroom soup will look creamier and less chunky than mine; this picture was taken after I’d added in extra ingredients for the casserole I was making.
Ingredients
- 8 oz mushrooms, chopped
- 1 cup milk
- 1 cup heavy cream
- 1 cup chicken broth
- 2 cloves garlic – pressed or minced
- 3 tablespoons butter
- 3 tablespoons brown rice flour
- 1/4 teaspoon pepper
- 1/4 teaspoon salt
Instructions
1. Slice the mushrooms. If you prefer your cream of mushroom soup like what you can buy in a can, chop your mushrooms small. We like bigger chunks. Saute the mushrooms in oil or butter, just for a minute or two. Then toss in the 2 cloves of minced garlic. The moment that garlic flavor hits your nose, you’re done. Take the veggies off the heat and save them for later.
2. In a saucepan or a frying pan (I use a frying pan), melt 3 tablespoons of butter over medium-low heat. Once it’s melted, add 3 tablespoons of brown rice flour, and immediately start stirring the entire mixture until it’s smooth. It’ll feel a bit granular, but the mixture should turn a nice shade of reddish-brown, and start bubbling. Then it’s time to add the milk. Stir it in, and keep stirring until the mixture starts to thicken. Then go ahead and add in the heavy cream and chicken broth.
3. When the sauce starts to bubble, turn the heat down a bit, and add the sauteed veggies, salt and pepper. Let the soup simmer for 15 or 20 minutes, and then it’s ready to either eat, or add into whatever recipe you’re making!
