All posts by Douglas

Gluten-Free Fried Dough

A year ago we went to the fair and Laura had fried dough.  Being gluten-free, of course, I couldn’t have any.  So I came home and looked up a recipe.  They do exist.  And maybe some of them are pretty good.  But the one I found was pretty heavy on the eggs, and didn’t really taste much like fried dough.  (I know, the eggs provided some of the fat that held it together, but it just didn’t taste right.)

Anyway, why am I bringing up the subject now?  Because a couple weeks ago, I discovered how to make GF fried dough by accident.

A couple weeks ago Laura used my biscuit recipe, and while I was eating the nice, piping hot biscuit, a thought crossed my mind: I bet if I put BUTTER and CINNAMON SUGAR on this biscuit, it would have the taste and texture of fried dough.

I was right.

So forget the fried dough. Make my biscuits and go crazy with the sugar coating.  Done.


Viral Charity

There has been an awful lot of back-and-forth about the ALS ice water challenge; some folks think it’s great and some folks think it’s awful.   I think that it’s great for ALS research, but is bad for society in the long run.

I’m not going to jump on the bandwagon of those who insist this viral charity thing should never have happened; I’m glad that a great deal of money was (apparently) raised for ALS research.  But I think it does not bode well for the future of charity and giving in our world.

There are millions  of causes that are equally worthy (and perhaps even more worthy) of our attention as ALS research.  AIDS research. IBS research.  Starving children in Haiti.  Starving children in Rwanda.  Cancer research. Homelessness in the US.  Parkinson’s research.  Education.  Orphanages.  Clean water in third world countries.  Hurricane recovery.  Alzheimer’s research.  Flood recovery.  On and on the list can go…just do a search for charitable organizations, and you’ll find just how many causes there are.  And just because someone came up with a creative idea for ALS research doesn’t mean that ALS research is a more important cause than any of the others.  If ALS “deserves” to have such a successful fundraising campaign, don’t all of these others?

Now that ALS has had such a successful viral campaign, I suspect that  many of these other organizations are thinking to themselves, “How can we get in on this and use viral social media to get more money in our coffers?”

The ALS fundraiser has taught people a lesson, and it’s not a good lesson: “I can make a difference in the world without it costing me anything.  In fact, not only did it not cost me anything, it was actually fun to make a video and post it to social media and impress my friends with my activism!”

And when the next viral charity campaign arrives, those people will say, “Alright!  I’m going to make a difference to people with Irritable Bowel Syndrome by posting a video of myself on the toilet !” (yes, this one has already started, and without any ill will toward my various friends with IBS, I sincerely hope it doesn’t catch on).

But here’s the problem: if 20% of the people who did the ALS challenge  donated to ALS, of that 20%, a certain percentage (I can’t guess how big a percentage) will say, “This is a great cause, but I just donated to ALS research, so I’m not going to donate to IBS research; I’m going to take the easy way out this time, and just post a video for all my friends to like.”

And once the IBS thing is done, and viral charity #3* comes along, even fewer people will donate to it, and we will quickly reach a point of little-to-no return for a whole lot of social activity.

Why is this a problem?  Because as viral charity continually decreases in effectiveness, what will not decrease is the number of people who repeatedly (and incorrectly) tell themselves, “I’m making a difference in the world without it costing  anything.”  (Don’t believe me?  Consider how many people were proudly convinced that they were making a difference in the world by “sharing” the Kony video back in 2012.  ’nuff said?)

(And if you’re thinking, “What Kony video?” you’re also proving a point about the fickle and shallow nature of “awareness” that social media promotes.)

Charity is costly.  But we are in the process of training an entire generation into believing that they can make a difference in the world without lifting a finger and without spending a penny.

I’m thrilled that ALS research will hopefully take a step forward as a result of the ice challenge, but I can’t in good conscience participate in it, because I don’t want to lend my own voice to the flawed notion that – in the long run – we can change the world without cost.   I also don’t want to lend my voice to the flawed notion that the charities worthy of my attention are the ones which can come up with clever, creative, viral campaigns.

If you participated in the ice challenge, rejoice in the fact that it was successful, but remind yourself that this is a flawed and doomed technique, and the next time something like this comes up, please politely decline to participate, and ask yourself if there is a worthy cause you can donate to.

And remind yourself that Doug doesn’t want to see a video of you sitting on the toilet!

Learn More about ALS

In 1994, a college professor at Brandeis University was diagnosed with ALS.  When one of his former students, Mitch Albom, heard of his diagnosis, he began a weekly pilgrimage to visit his old professor.  A pilgrimage by plane from Detroit to Massachusetts.  On his own dime.  For thirteen weeks.

In 1997, he wrote and published a book about the experiences, titled Tuesdays with Morrie.   The book topped the New York Times Bestseller List  for 22 weeks in 2000.  It was made into a TV movie and a stage play.

In 2013, 16 years after he wrote the book, I picked up a copy, because I had heard so many good things about it.  That – and not the ice challenge – was my introduction to ALS.  Imagine that – 16 years after publication, Mitch Albom’s work is still causing people to find out more about ALS.  I sincerely hope the book has been successful enough to recoup the money he spent on all those plane tickets, but the truth is, regardless of how much the book may have profited him, the difference he made to Morrie, and to others with ALS, began at cost to himself.

That’s the model of giving I want to use for myself.

———————-

* Viral Challenge #3 is “Chug a beer to stop PMS,” which points out another issue that we’re going to have to deal with: people are already not taking this seriously.  
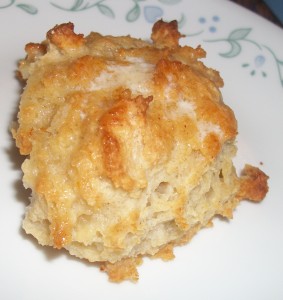
Gluten-Free Biscuits

Gluten-Free Biscuit

Gluten-Free Biscuit

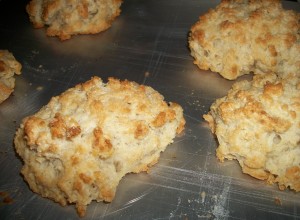
Oh my, oh my, what splendid texture these biscuits have!  Golden brown and crisp on the bottom and top, and soft and moist in the middle!  I decided I needed to type up this recipe before I forgot what I did!

Ingredients

  • 1/3 cup tapioca starch
  • 2/3 cup potato starch
  • 1/3 cup brown rice flour
  • 1/3 cup sorghum four
  • 1 tablespoon baking powder
  • 1/2 teaspoon salt
  • 1 teaspoon xanthan gum
  • 6 tablespoons butter (chilled and cubed)
  • 2 tablespoons vinegar
  • 1 cup (minus 2 tablespoons) milk

Instructions

  1. Preheat the oven to 425 degrees
  2. Pour the vinegar in a 1 cup measuring cup, and fill the cup the rest of the way with milk.  Stir together, and let it set while continuing with the next steps
  3. Combine all the starches, flours, baking powder, salt, and xanthan gum.  Whisk together to blend well.
  4. Add the butter and cut it into the mixture with a pastry cutter, until it resembles coarse crumbs.
  5. Add the milk and vinegar mixture, and mix only until the mixture is moist.
  6. Spray a cookie sheet with cooking spray.
  7. Scoop the dough onto the cookie sheet, dividing it into 8 equal scoops.  This is messy if you try to do it by hand, so you may want to use a spatula or large spoon sprayed with cooking spray.
  8. Cook for 20 – 25 minutes, or until the biscuits are nicely browned.
Gluten-Free Biscuits

Gluten-Free Biscuits

What made these great (in my opinion) is their wonderful texture.  Like any gluten free bread/pastry, they don’t have quite as much flavor as the gluten alternative, but slather some butter, honey, jam, or maybe even cinnamon sugar on these, and you’ve got something wonderful!

(We ate half of these tonight, and tomorrow night we’re going to tip the remaining biscuits over and use them as the bread for tuna-melts.  I’m looking forward to that experiment!)

Gluten Free Crab Stuffed Haddock

Haddock with Gluten Free Stuffing

Haddock with Gluten Free Stuffing

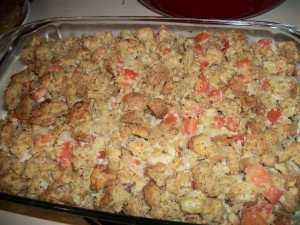
Crab Stuffed Haddock has been one of our favorites for awhile, but there are a couple problems with it.  First, it’s very expensive to make, and second, we really love the “stuffed” part of the meal, and there’s never enough of it.

So this is my own version of crab stuffed haddock, which really is not crab stuffed haddock at all – it’s more like “crab-stuffing smothered haddock,” or “crab-stuffing haddock casserole.”  There’s enough “stuff” with the fish that we don’t feel like we need to have a whole fillet apiece, so it costs half as much as the actual “stuffed” version.

Ingredients

  • 2 haddock fillets
  • 1/4 of a yellow onion, diced
  • 1 garlic clove, minced or pressed
  • 4 slices gluten free bread (we use this bread recipe), cubed
  • 1 plum tomato, seeded and chopped
  • 1/2 cup grated Parmesan and/or Romano cheese
  • 1 can crab meat
  • 1 tablespoon lemon juice
  • 3 eggs, beaten
  • 3 tablespoons butter, melted
  • olive oil
  • 1/4 teaspoon salt
  • 1/4 teaspoon pepper

Instructions

  1. Preheat the oven to 375 degrees.
  2. Saute the onion and garlic over medium-high heat in the olive oil. Remove from heat.
  3. Stir in the bread cubes, tomato, lemon juice, cheese, crab meat, salt and pepper.
  4. Pour the beaten eggs over the mixture and thoroughly stir until all the stuffing mixture is moistened.
  5. Lay the two haddock fillets out flat in a sprayed 7×11 baking dish (you can probably use another size, but the haddock fillets fit perfectly in this size dish!).
  6. Since this recipe makes four servings, cut each fillet in half before spreading on the stuffing; this will make it easier to take out individual servings.
  7. Rub some olive oil onto the top of the fillets.
  8. Spread the stuffing mixture over the top.
  9. Cover with foil.
  10. Bake for 20 minutes at 375, then remove the foil and bake for an additional 10 minutes.


Gluten-Free Crackers

Gluten Free Crackers

Gluten Free Crackers

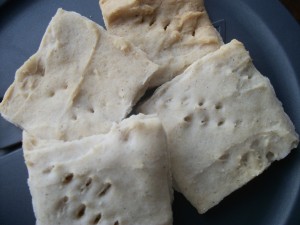
The last time communion was served at our church I started thinking about the fact that I can no longer participate due to my problems with gluten.  That got me started thinking about unleavened bread, and I started looking online for gluten-free cracker recipes.  I found a few that looked like they might work, but they called for rolling out dough (usually between sheets of parchment paper).  I hate rolling out GF dough, so I decided I was going to invent my own recipe.  Attempt number one was a disaster (a disaster so disastrous that we almost needed to clean the oven when I was done!).  Attempt number two was less disastrous than the first (I actually ate the crackers, instead of throwing them away, and no injury was inflicted upon the oven).  The third attempt was what I would consider a success.  The flavor was quite nice, and the crackers remained crunchy, even after a couple days.   Since I avoided the “roll it out” process, you’ll notice that my crackers are very non-uniform.  That just adds to their charm, in my opinion!

Ingredients

  • 3/4 cup potato starch
  • 1/2 cup sorghum flour
  • 1/4 cup brown rice flour
  • 4 tablespoons butter
  • 1/4  teaspoon baking powder
  • 1/2 teaspoon salt
  • 1/2 teaspoon xanthan gum
  • 3/4 cup water
  • optional spices *

Instructions

  1. Preheat the oven to 400 degrees.
  2. Combine all the flours, baking powder, salt, and xanthan gum.
  3. Cut the butter into the mixture with a pastry blender, until the mixture resembles coarse crumbs.
  4. Add the water a bit at a time, stirring together with a fork as you do.
  5. Use a sprayed spatula to spread the batter evenly on a stoneware baking pan 10.5 x 15.5 (approximately 160 square inches).  Make sure you spread the batter as evenly as possible, to avoid very thick or very thin areas.  Thick areas will end up doughy, and thin areas will become too crisp/scorched.
  6. Use a knife to cut the batter into small squares, and a fork to pierce it.
  7. Place the baking pan in the oven and cook for 40 minutes.  After the first 30 minutes, you’ll want to start checking the crackers every few minutes.  If you see portions starting to brown, it’s time to pull them out!
  8. It’ll come out of the oven as one giant cracker, but it’ll easily snap into squares where you cut it with a knife before baking.
  9. Store in an airtight container.

*  I’ve tried a couple different ways of spicing up my crackers.  One way was to add a little bit of garlic salt and/or onion powder into the mix.  Another was to add some rosemary and thyme (I refer to them as my ‘Scarborough Crackers!’).  What else could you try?  Well, at some point I’m going to try adding some chili powder or cumin.  Maybe sometime I’ll try mixing in some pepper.  Experiment, and let me know what works for you!

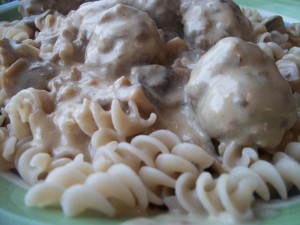
Gluten-Free Swedish Meatballs

Swedish Meatballs

Swedish Meatballs

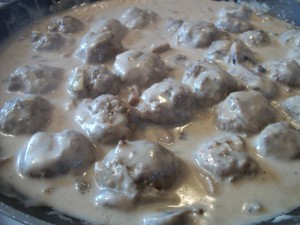
Do you know what Swedish Meatballs are?  I don’t.  I’ve had them many times, and for every person who has served them, there has been a very different recipe.  Maybe someday I’ll ask my Swedish relative for a precise definition, but in the meantime, this is my conglomeration of what I like best about different meatballs-in-a-gravy recipes I’ve had.

Plan on an hour to 1.5 hours to cook this, depending on how long you intend to let the sauce simmer.

We’ll make use of my Gluten Free Cream of Mushroom Soup recipe, but we’ll make some modifications to it, as follows:

  • Use beef broth instead of chicken broth
  • Add 1/4 large onion diced, and saute it along with the other vegetables.
  • add an extra 1/4 teaspoon of salt

Meatball Ingredients

  • 1 pound ground beef
  • 1 cup gluten-free bread crumbs/cubes (about one slice of this bread, shredded)
  • 1/4 teaspoon nutmeg
  • 1/4 teaspoon pepper
  • 1/2 teaspoon salt
  • a dash of garlic powder
  • 1/4 large onion
  • 1 egg, beaten
  • 1/2 cup milk
  • 1 tablespoon butter, melted

Instructions

  1. Preheat the oven to 375 degrees.  Yes, you could pan fry the meatballs, but once someone pointed out to me that I could bake them in the oven instead, I’ve never gone back to pan frying – it’s far more hassle than it’s worth!
  2. In a large mixing bowl, mix the ground beef, bread crumbs, onions, and the seasonings.
  3. In a separate bowl, beat the egg and mix in the milk and melted butter.
  4. Pour the liquid ingredients over the meat mixture and thoroughly combine.
  5. Either by hand, or using a handy-dandy meatball maker, make the meatballs and arrange them in a baking dish.
  6. Cook them for 1/2 hour at 375 degrees.
  7. While the meatballs are cooking, make your mushroom soup.
  8. 100_1785

    Swedish Meatballs

    Take the meatballs from the oven with a slotted spoon, so excess grease will drip out, and add the meatballs to the soup.

  9. Let it simmer as long as you like, until it’s as thick as you want it.  I usually let it simmer for about a half an hour.
  10. But what are you going to serve this on?  Well, it’s really up to you!  Serve it with gluten-free pasta, or maybe with rice, quinoa, or whatever grain suits your fancy!

This recipe feeds Laura and me for two meals, so it’s about 4 adult servings.

Thinking about Christmas…

I’ve revamped the “Products” section of The Problem Site to include some new features, including attractive images of many of the products, along with links to online stores where you can purchase the products.

During the next three months (October, November, and December), while people are thinking about and planning for Christmas, I’ll be updating this section of the site every Monday morning with a new educational game or toy that you might consider buying for a child or grandchild (or, in some cases, for a teacher).

Last week I posted about Chocabloc, which is a pentomino set which looks like chocolate!

Tomorrow I’ll have a brand new product posted. Be sure to check in each week for the latest product.

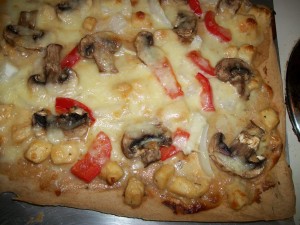
Gluten-Free Pizza Crust

Gluten Free Pizza Dough

Gluten Free Pizza Dough

Pizza crust is not a hopeless cause for those who are gluten free, but it can be a bit frustrating.  In some ways, though, I prefer it.  I was never very good at stretching out a pizza dough and spreading it onto a pizza pan, but with this recipe, you don’t do any stretching; the dough is spread over the pizza pan with a spatula, because the texture and consistency is more like batter than dough.

Ingredients

  • 1 cup warm water
  • 2 teaspoons yeast
  • a squirt of molasses
  • 2 tablespoons oil
  • 1 egg
  • 1 tablespoon vinegar
  • 2/3 cup potato starch (NOT potato flour)
  • 1/3 cup tapioca starch (may be called tapioca flour)
  • 3/3 cup sorghum flour
  • 1 teaspoon xanthan gum
  • 1 teaspoon salt
  • 1/8 teaspoon baking powder

Directions

Preheat the oven to 375 degrees.

1. Combine the water and yeast and allow the yeast to dissolve.  Add all the other liquid ingredients and mix thoroughly (I use an electric hand mixer).

2. Combine all the dry ingredients and then blend into the liquid ingredients with the mixer. Continue mixing until the batter is smooth.

3. Spray a 15×14 cookie sheet (that’s a little over 200 square inches, in case you need to find alternatives to a 15×14).  Dump the batter onto the middle of the sheet and use a sprayed spatula to spread it evenly around.  Spread it right to the very edges of the sheet.

4. Place the crust into the oven and cook for 30 minutes, without toppings.  While the dough is cooking, prepare veggies, meat, sauce and cheese you will be using to top your pizza.  After 30 minutes, take the crust out, raise the oven temperature to 425, and add toppings to the crust.  Your sauce and toppings can go pretty much to the edge of the pizza; be aware that the edges will probably be quite crispy, so it’ll be nice to have some toppings there!

5. Put the pizza back in the oven and cook for 10 to 15 minutes, depending on how brown you like your cheese to be!

And that’s it!  The pizza in the picture is a chicken pizza with white sauce, mushrooms, onions, and red peppers.

Gluten Free Apple Crisp

“You don’t need to give me credit for this recipe.”

“But mom, if I don’t, people will think it’s my recipe, and that wouldn’t be honest!”

“Whatever!”

So, yeah, this isn’t my gluten-free recipe.  It sure is yummy!

Ingredients

  • Filling
    • 8-10 medium sized apples, peeled and sliced
    • Mix together:
    • 1/3 cup sugar
    • 2 Tbsp. cornstarch
    • ½ tsp. cinnamon
    • Dash of nutmeg and cloves if desired.
  • Topping
    • ¾ cup of sugar
    • ¾ cup of white rice flour
    • 1 tsp. cinnamon
    • ¼ tsp. of nutmeg
    • Dash of cloves
    • 1 stick of butter or margarine.

Instructions

1. Stir together all the filling ingredients and place in an 8×8 or 9×9 inch pan.

2. Cut butter into the other topping ingredients until mixture is crumbly.

3. Sprinkle topping over apples and pat down gently.  Bake in a 375 degree oven for 50 to 60 minutes.

Serve warm with vanilla ice cream or whipped cream.